Quantcast
Channel: Skirmish Sangin Blog
Viewing all 103 articles
Browse latest View live

Call to Arms preparation- Progress?!

$
0
0
The Insurgent painting competition has closed! We are collating all of the images which were sent in now. We will show them off, along with announcing our winners later this week. A big thanks to all those who entered, keep an eye out for the images!

As for my Call to Arms forces....

All of the Australians had made the painting table, unfortunately the two fire-team leaders have lost the aerials for their backpack radios.

As a simple solution, I used a drill, greenstuff and a spare metal pike from one ancients army or another (I mainly use these to pin with), to make some radio aerials for my fire-team leaders.


While not as perfect as the aerials that Empress provide, these will be a whole lot less fragile, and will still look the part.

Now as to painting, this is where I have got to so far on the Australians:


All of them have their camo done, now it is just skin, weapons, detailing and basing.

Here is a close up of one of the squad leaders, showing off how the Crye camo currently looks:


I am hoping to get the detailing done this week.

And as for the Taliban?


Well, progress is being made, all of them have got the base colours done on their clothing, now I need to ink/highlight that, then do the skin, weapons, webbing, beards etc.

And I still haven't started on the technical.

But still, progress is progress!


Call to Arms Preperation- Javelins and Maths

$
0
0
We are just finalising our Insurgent competition, it will be up here on the blog by the end of the week!

Today's Call to Arms post is a look at the Javelin missile, and at a bit of simple maths.

The FGM-148 Javelin Missile is a US made, man portable anti-tank missile. Guided by a laser, the Javelin is a fire-and-forget weapon, once it has it's target the operator does not need to continue to guide the missile as they would with earlier missiles such as the TOW or Dragon.

You made the sound effect, didn't you.....

One of the cooler things about the Javelin is that it either can be used in a direct attack mode- flying straight into the target, or it can use a top attack mode, flying high, then coming down vertically onto the target. The top attack is designed to defeat the weaker top armour of a tank, as opposed to trying to take on the tank's heavier frontal armour.

According to the fountain of all knowledge, known to mortals as Wikipedia, the Javelin has been used in Afghanistan to:

During the War in Afghanistan, the Javelin was used effectively in counter-insurgency (COIN) operations. Initially, soldiers perceived the weapon as unsuited for COIN operations due to its destructive power, but trained gunners were able to make precision shots against enemy positions with little collateral damage. The Javelin filled a niche in U.S. weapons systems against DShK heavy machine guns and B-10 recoilless rifles; weapons like the AT4 and M203 had good effects but insufficient range, medium and heavy machine guns and grenade launchers had greater range but insufficient effects, and heavy mortars had good range and effects but poor precision. The Javelin, as well as the TOW, had enough range, power, and accuracy to counter standoff engagement tactics employed by enemy weapons. With good locks, the missile is most effective against vehicles, caves, fortified positions, and individual personnel; if enemies were inside a cave, a Javelin fired into the mouth of the cave would destroy it from the inside, which was not possible from the outside using heavy mortars. The psychological effect of the sound of a Javelin firing sometimes caused insurgents to disengage and flee their position. Even when not firing, the Javelin's CLU was commonly used as a man-portable surveillance system

So that is the Javelin, on to the simple maths.

The Javelin has an effective firing range of 75 to 2500 metres. In the Skirmish Sangin rules, the range equates to a maximum range of 1250" and a minimum range of 35". It was Craig who pointed out that the tables we will use at Call to Arms are 4 feet square, or 48" by 48". If you look at the minimum range of the Javelin compared to the table size, it looks like this:


The yellow spot in the corner is the Javelin gunner, and the grey area represents the area on the board which he is unable to target the enemy with the Javelin, due to it being within his minimum range! So in short, if you bring a javelin to a knife fight, you aren't going to be shooting it!

Now, what does that mean for my Australian list?

Well, primarily that I don't think I will bring a Javelin. To use it with any effectiveness on a smaller table like the 4x4 ones at Call to Arms will take a serious amount of forward planning on my part, and no small amount of luck. Plus, now I have put it's major weakness online on a blog which I assume is read by all of the people entering the competition, who now all know exactly how to defeat the weapon in a game of Sangin.....

But what to replace it with?

Looking at my Australian figures, there were a few options.

Option One:
Drop the quality of some of my Australians, and bring a third fire-team. Tempting, because it would give me a lot of numbers, which would more than shock a few of these Taliban forces who are counting on outnumbering the ISAF forces!

I am not so keen on this one, mainly because it is another 4 guys I would need to paint. Could I do it? Probably. Is it the best option? Probably. Am I going to go for it? No.

Option Two:
By dropping the quality of some of the Auzzies, it would free me up some points to bring their transport, a Bushmaster vehicle. A bit of armour, some firepower, but like the extra fire team, a bit more painting than I think I can do before next weekend. Plus my Taliban are already bringing a technical, so I don't want to be accused of repetition!

Pictured: Option One and Two, looking completely unpainted! Crikey that Bushmaster is a bright white resin....

Which leaves Option Three:
I could replace my two man weapons team, with another two man team. Heavy machinegun is an option, but I lack a good fixed MG model, one that looks different than my 2 Minimi gunners (because I will forget it is a gun team if it isn't!).
The most appealing option for me is to replace my 2 man javelin team with a 2 man sniper team. For those who were looking closely yesterday, they would have actually spied the sniper lurking in the background of the photo. I have got the camo done, and last night I did the undercoat on all the Auzzies' boots and skin. And did no painting on the Taliban. But I am still making progress right?


The sniper is the standard figure from Empress, but I was short a single Auzzie helmet (even after the guys at Empress gave me some more!), but with a brain wave, I remembered I had some spare USMC heads wearing boonie hats! While it is not a slouch hat, it looks more than suitable for an auzzie sniper in my mind!

So the Sniper Team will be Two Veteran Australians (150) wearing Body Armour (20) with a Sniper Rifle (10) and an Assault Rifle (10). I had ten points spare in my basic list, so I have enough points left to give them both a grenade each as well.

Right, back to painting. Hoping to have some progress with these guys tomorrow, and really need to have some progress with the Taliban. And wasn't I building a technical?

Pooch

Insurgents Competition - Results!

$
0
0
Our competition celebrating the release of our first four Taliban (details on how to buy some here) ended last week, and after some time taken to collate all of the results, we have been left with no less than 8 entrants who will be sent a pack of our four brand new Taliban miniatures to add to their forces!


So these are the first four Taliban, painted by Craig. The next wave of Taliban will be available VERY soon (we will let you know, don't worry!), and they will be followed by yet another wave of Taliban after that. After all, what is a game in Afghanistan without some cracking good Taliban miniatures?

Below are just some of the awesome pictures that we were sent of Insurgents painted by people out there in the Sangin Community!

First up is two Empress Miniatures Taliban Motorcyclists, by Steve E. You have to admire the lovely blue and red bikes, such a good contrast to the more muted colours of the riders.


Spyros has sent some Empress Taliban, he has opted for an interesting combination of muted browns, punctuated with some brighter whites and blues. Like before, we have a cool blue motorcycle- Am I sensing a theme?


James of Scotland has sent through two close ups of some Empress Taliban. One rocking a splendid blue dishdash, which I am unashamedly going to copy for my Call to Arms Taliban.


"Can you hear me now? No I don't want to upgrade my long distance plan. All I want is some mortar support! Don't you dare put me on hold!"


Darren has sent through a picture of what can only be described as a horde of Empress Taliban! Those are some lovely browns and yellows on the cloth, Darren has done a cracking job on them!


Pat sent through not just pictures of his Taliban, but also a picture of them in a game! He assured me that the Taliban were completly victorious. Or maybe they weren't, but I choose to remember it as a glorious victory for the Taliban forces!


Check out those sweet sneakers on the sniper!


Matt H has sent through a miniature from Battlefield Evolution, from Mongoose Publishing. Now I can't seem to be able to find the miniatures anywhere (although, clearly I need to try harder). He has painted him up as a member of ISIS, although Matt has complained that he looks too "ninja", I think the black clothing works well!


Peter T went with a different manufacturer, option to bring Taliban from The Assault Group. Peter has done a great job with them, including the Osama figure! Operation Geronimo anyone?


And rounding out our winners this time is some cool 20mm Taliban from Underfire Miniatures, sent through to us by Carvel. Not only did we get cool pictures of the 20mm Taliban, but what Carvel did with the Renedra building is awesome too! I have been resisting 20mm, but Carvel is slowly breaking me down.....


A huge thanks to all those who sent us pictures, we always enjoying seeing what those in the Sangin Community are up to with their games. Don't forget that we are always looking for more content for our books and our blog, After Action Reports, articles, things you have painted, or even just to tell us how awesome we are, don't hesitate to drop us an email, we look forward to hearing from you!

Pooch

Adam- MARSOC- making Berets and Painting Commandos

$
0
0
Armies of Afghanistan has wound down a bit, but Adam clearly hasn't! He has sent through some tips on how to sculpt a beret, along with a few pictures of the work in progress for his MARSOC and Commando force.

Hey there, I've been pretty busy despite the break in school but I have managed to get some progress on this project. I was really stoked to get the minis and had been working on several ideas in my mind as to what to do with my minimal skills to make them look the part.

One was berets, or 'French Hats' as I jealously refer to them as! I needed to get a couple of them to signify NCO's and officers of the Afghan National Army's,(ANA) Commando Kandaks that I am portraying here. Generally they wouldn't be worn on patrol, but these are wargaming miniatures so they need to be representative as well as illustrative. So berets for the NCO's and O's. The minis have either kevlar helmets or patrol hats so some minor surgery was needed. I tried a couple different ideas and this worked the best.

The starting model:


Scalp them.


Roll out a small ball of green stuff, probably smaller than you think, see the pic. Then smash it onto the head and shape it like you care.


You will often find French hat wearers staring at mirrors trying to get that perfect look. Just saying...


Another detail was the lack of pouches and nonsense on some of the minis. Now I must say that they are excellent sculpts as well as castings from Eureka but my Commandos do a lot of foot patrols unlike the modeled Police. So I made a few pouches and packs or water bladder carriers.


Now onto the Critical Skills Operators, (CSO) of MARSOC. I've drafted a Eureka SAS troopie on a quad bike to go with my Eureka Aussie SF motorcyclist.

Chopped the head off the Aussie, swapped it with an ANZAC head with a kevlar from the Skirmish Sangin Kiwis and did a bush cover trim on the SAS boy. Those big floppy hat brims look a bit strange to Marines.


Both of these minis got a few extra pouches by milliput or hack and slash methods.


The Ranger from Pooch was disassembled and repainted a nice light khaki and them washed with Brown Tamiya model wash, I like this stuff though it's the first time I've used it. However, my first bull bar and roll bar attempts have been rejected by quality control, and I am in search of 3mm brass wire.


Everybody got a good old fashioned woodland camo scheme as well as desert boots and Commando patches. Just waiting on final dry brushing, detail bits and basing add ons. (Bases are washers, thanks Andy!)


In the end I've got a suitable manoeuvre element for a Sangin game to complement my other figures or even on their own buffed out a bit. My other Afghan Police minis will be mostly more Commandos but I will keep a couple of them as Police in their grey blue.


Looking great Adam! You will have to keep sending through pictures as the painting continues- I will be very interested to see how the roll bar turns out on your Ranger! For all those who were looking lovingly at Adam's motorbike and quad bike, the rules for them you can find in Despatches II, out later this year.

Posts from the Sangin Community- 20mm Chinook!

$
0
0
During the Insurgent competition, I got chatting with a few of those who are playing Skirmish Sangin around the world.

One of them, Carvel, got me thinking about 20mm. There are some great manufacturers out there doing some awesome stuff in that scale, and it had never even occurred to me. Perhaps it was willful blindness? While I was doing a good job of resisting yet another scale of miniatures, he did send through some awesome pictures of an RAF CH-47 Chinook he recently finished.


The first shot is of a squad of Royal Marines disembarking from the Chinook- two nice neat, orderly lines.

Carvel used weathering powders to good effect- this Chinook definitely looks like it needs a thorough scrub down!


The last image shows off what I think is a pretty cool basing option. Rather than go for a tall flight stand, the Chinook is hovering just above the ground, disembarking onto a raised area. Although Chinook pilots like to land the aircraft to disembark troops, they are able to hold it at a hover, with the door touching the ground. This is useful when deploying troops into places which don't have enough space for a proper LZ, such as up on mountain ridges.

With cool pictures like these of helicopters (I might be slightly helicopter obsessed), any bets on how long I will be able to resist 20mm? I do like the appeal of having access to more helicopter models!

Don't forget to get in touch with us if you have After Action Reports, game ideas, scenarios, painting or whatever to share, we love hearing from you!

Pooch

1st tournament

$
0
0

So the first SKIRMISH SANGIN Tournament was played this weekend

We all had some laughs, even though it was hard work, five games over a weekend for most of us left us all I am sure a bit dazed and confused. Awards were won, books and figures sold but more importantly interest was generated.

The group of players were all excellent and played hard games that were very narratively based. As with all things not everything went smoothly, mistakes were made and the cramped space made for a bit of manoeuvring on our part. However I think we would all agree it was a success and I would like to publicly thank my two off-siders for all there invaluable help.


  • Craig for continuing to build beautiful terrain and managing to ref with a severe hangover on Sunday.
  • Chris, for helping us with all the set up and for being good enough to play the entire weekend knowing we wouldn't let him win.


I would also like to thanks Ray, and Tom and Chris for lending us terrain.

I am sure the medal winners will wear their medals with pride.

Here is a few images of the event.


Call to Arms- Armies done and dusted!

$
0
0
Well, I managed it, finishing the last bit of basing on my two forces for Call to Arms on the night before the event (well timed that!). The weekend went very well, I had three tough games, achieving the distinction of being Most Mortared by the end of the weekend, my forces being subjected to no less than 5 scarily accurate 81mm mortar barrages in their three games! Needless to say, this had a very negative impact on my force's ability to fight the enemy!

Mortars aside, I did have a great weekend, you have already seen a few of my photos as part of the overall pictures for the weekend, but I also wanted to share a few close ups of my two forces for the weekend.

This is how they came out:

My Taliban:


More on the technical soon, in case you want to build one of your own!.

My Australians:


Even the Javelin team that got left behind got to make an appearance!

Next on the painting table for me? I am going to finish the remaining 10 or so Australians, before I forget how I did them. Plus they have a few transports (you know which one Spyros!) so I am going to get them all off my painting table.

That is, unless I get distracted by a set of our brand new Taliban that I got over the weekend too!

Pooch

Post 100+ A Look Forward

$
0
0
We had planned to have this post marks the 100th put up here on the Skirmish Sangin Blog, but we got so distracted by Call to Arms and sharing pictures of the weekend that we forgot about the milestone!

So although this may not be post #100, we would just like to take the opportunity to say that we have really enjoyed talking with the commenters, sharing our ideas for gaming and showing off some of the great work people are doing out there in the Sangin Community. While we three writers might think we have a great game, which we personally enjoy playing, it still surprises us, how it has been received by the wider community of gamers, your feedback, comments and images provide us even more encouragement to keep making books and writing rules.

In light of it being our 100th post (ish), we thought we would share some of our upcoming releases....

DESPATCHES II


Despatches II follows the same style as our first Despatches book, made up of articles, scenarios, ORBATs and other really useful stuff for Skirmish Sangin gaming.
Inside Despatches II you can find....

- Additional vehicle rules, including how to field on-table helicopters in your ISAF list.
- Scenarios, ranging from vehicle checkpoints to helicopter assaults and everything in between.
- ORBATs for the Dutch and the long awaited Taliban ORBAT

We hope to have this out before the end of of October. Its currently at the editors, so we are on track. Th final running order of articles may change as once again we have more articles than space but whatever ones make the cut you can believe it will more despatches gold :-)


MAALINTII RANGERS (DAY OF THE RANGERS)


Day of the Rangers is out first Battle Book, focused on the actions in September 1993 in Somalia. Battle Books are different to a Despatches book, firstly because they are no longer set in Afghanistan, but secondly because they are setting out to represent a specific series of combat actions.

In the case of the Maalintii Rangers, it means some special Somalia specific rules, things which will add to the main rules to give the right "feel" for the battles in Mogadishu. The release of Maalintii Rangers will be supported by a range of 28mm US soldiers amongst others, which you have already seen a preview image for here....

Inside Maalintii Rangers you will find....

- A Somalia ORBAT, with rules for mobs of civilians
- US ORBAT for Rangers, D-Boys and 10th Mountain
- ORBATS for the UNOSOM II forces, such as the Pakistanis
- Additional helicopter rules- Because it isn't the Maalintii Rangers without Blackhawks and Little Birds!

When will this be out you cry? The team are working on it now, but we are not sure just yet but lets just say as soon as we can after Sangin Despatches No.2!

Is that all we are working on? Well, no actually, no it is not. But we have to keep some secrets!

So thank you for reading our blog. Let us know what you want to see more of - scenarios, AAR's, painting guides, book reviews, ORBATs, miniatures reviews or something completely different? Get in touch either in the comments, or by email. We look forward to hearing from you!

Colin, Craig and Chris


Building a Technical

$
0
0
As requested, here is a bit more information about the technical that my Taliban force had for Call to Arms.

To cut a long story short, a technical is:
a type of improvised fighting vehicle, typically a civilian or military non-combat vehicle, modified to provide an offensive capability similar to a military gun truck. It is usually an open-backed civilian pickup truck or four-wheel drive vehicle mounting a machine gun, light anti-aircraft gun, anti-tank weapon, or other support weapon. (Wikipedia)
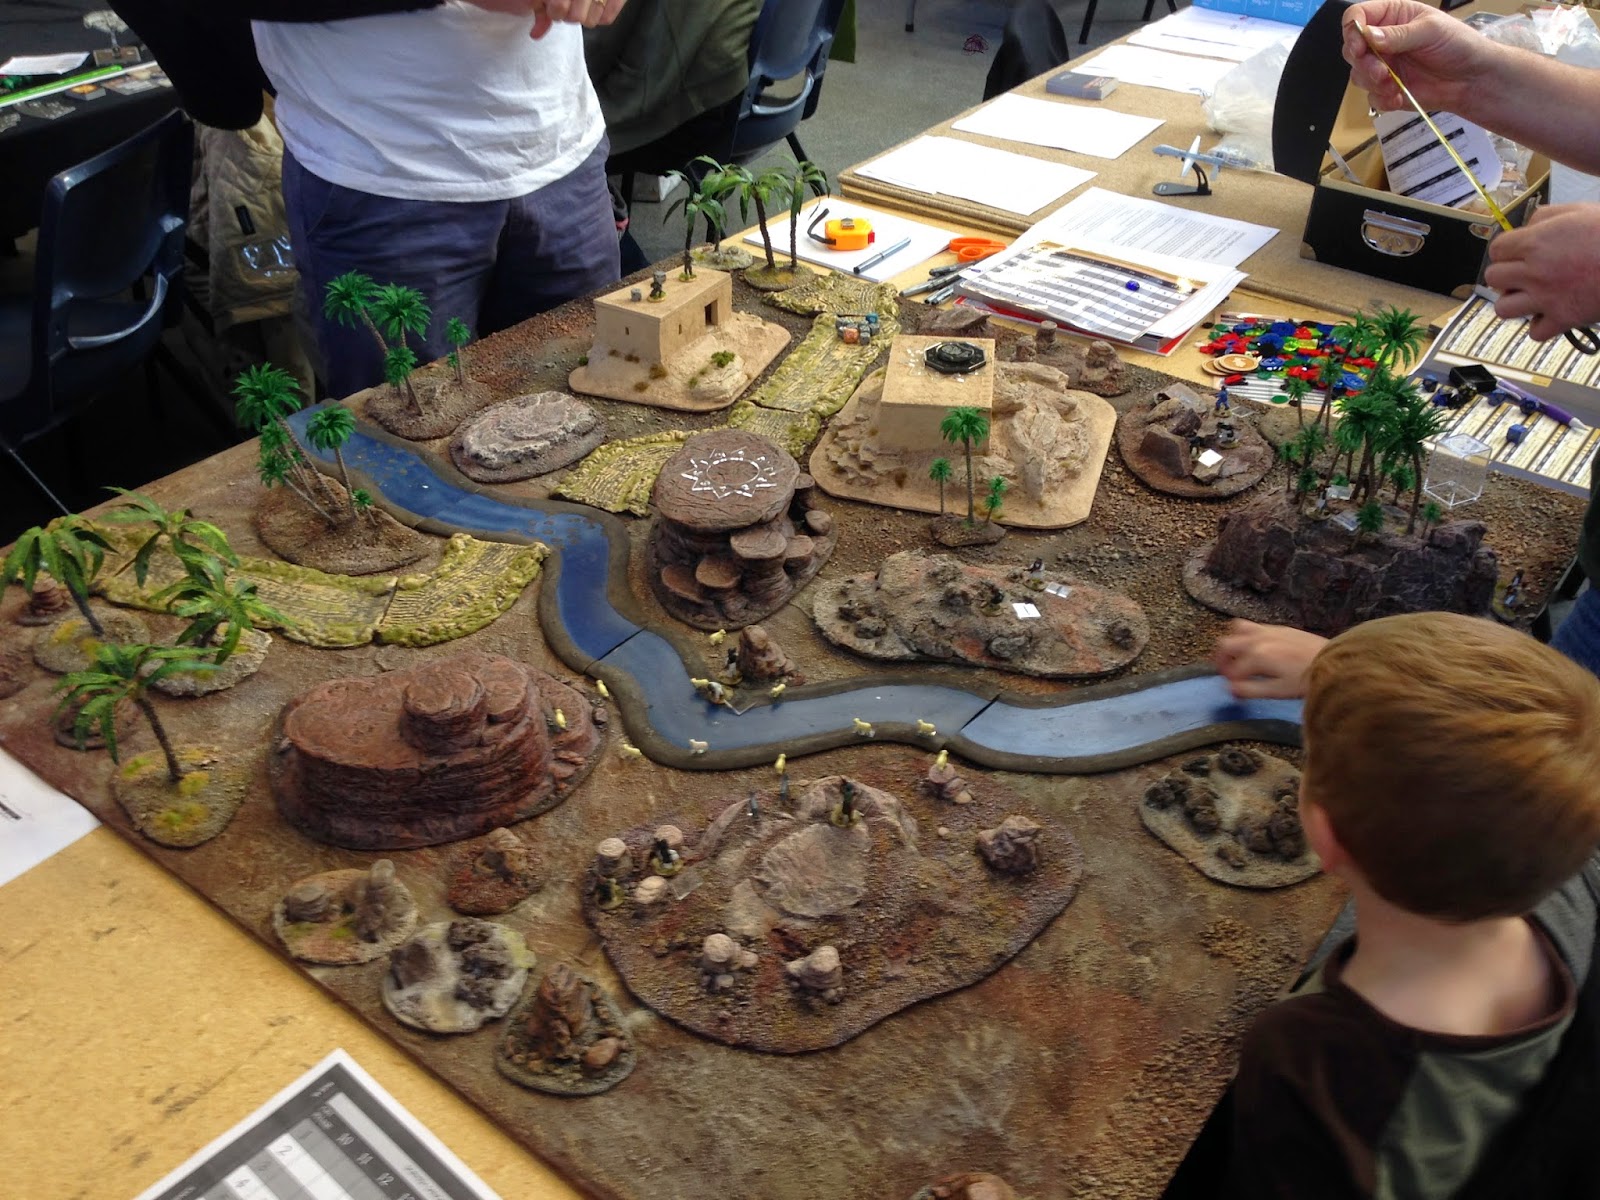
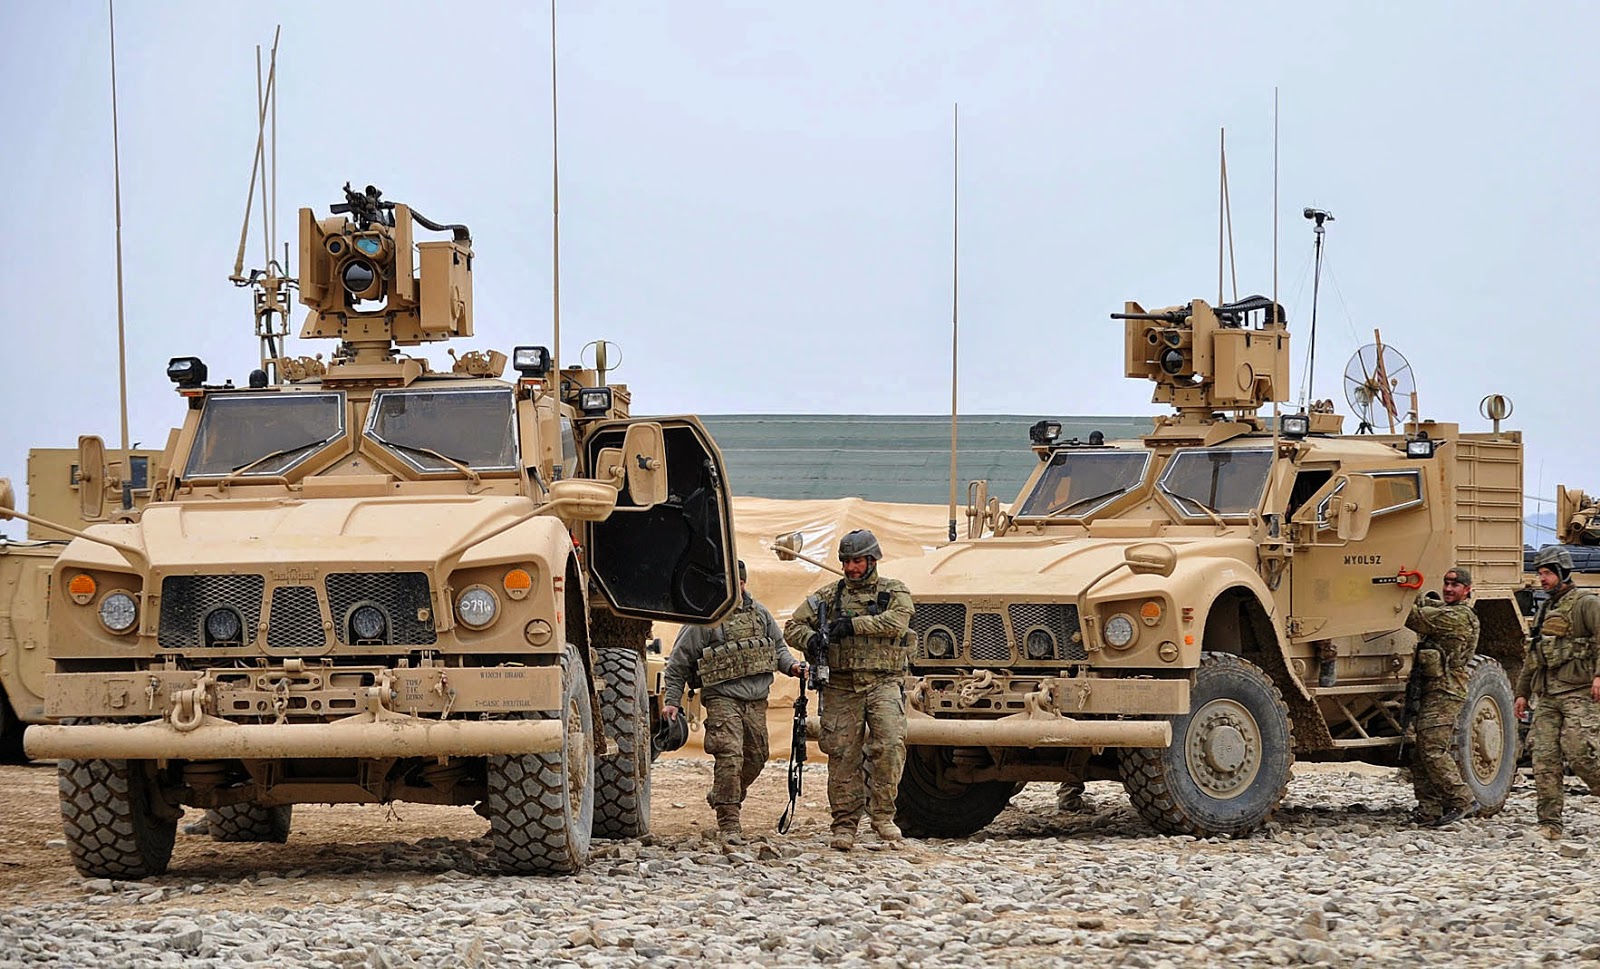
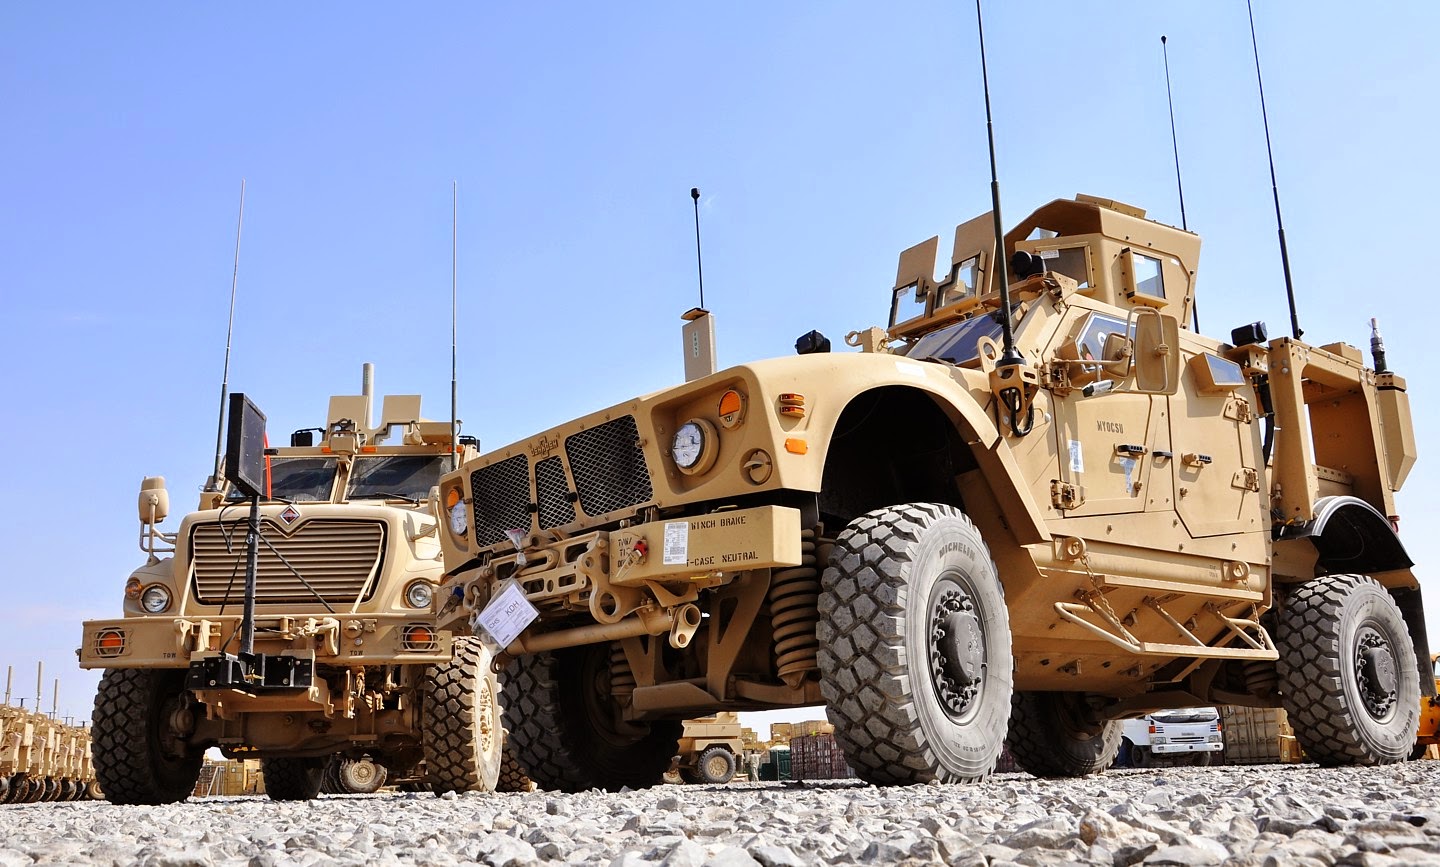
Like this:

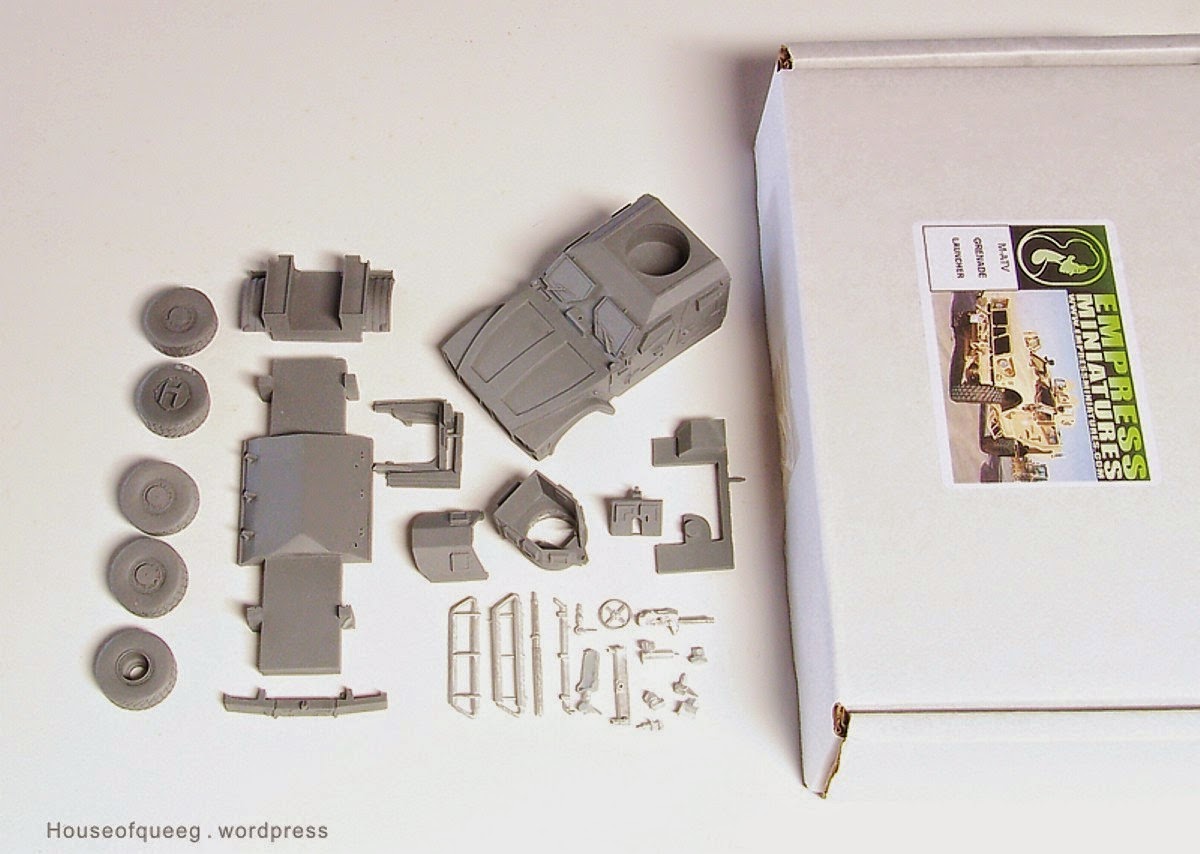
There are some good technical models out there- Empress do a nice resin one with a variety of armaments. So one could assume that I had one lying around ready to go?

Well, no. I didn't actually.

What I did have, was this kit from Airfix:


I bought this kit to go with my Irish force actually, the Snatch Landrover is 3/4 finished in a stunning shade of white for UN duties(which one day I will finish, honest!). Which leaves the WMIK, which I had always planned to turn into a technical.

I thought I would share some of the ideas and tricks I found while converting the Landrover WMIK into a Taliban Technical.

The first few steps are to simply build the chassis of the WMIK, making sure to not include the V underarmour, and removing any upper superstructure for the vehicle. With my technical was loosely based on the one above, I wanted to keep the whole vehicle structure low.

The first challenge comes in the back tray of the landrover. The back of the vehicle has next to no detailing, it is all covered by the upper superstructure of the WMIK. To correct this, I used some plasticard which had striations on one side. I think it was designed to be used to make roofing tiles, but it works perfectly as the grooved rear tray. I chose to also build up the sides as well, to make it look like a more interesting ute (pick-up) back.


Once you are happy with the plasticard, the next step is to use Greenstuff to smooth out the joins, making it look like it was always meant to be there! While the green stuff is drying it it time to make some crew.

Craig and I have always been in agreement that vehicles look cooler when they have crew. Especially when it is going to be an open-topped technical!

Luckily for me, I had a couple of spare Taliban lying around. The gunner comes from Eureka Miniatures, from the 14.5mm DsHK gun team, but had sadly lost his gun (he donated it to the ANP technical). The driver is a bit more complex. I started with an Empress Miniatures Taliban, who was last seen fleeing from Jose the Military Working Dog in Despatches 1 (page 62). Unfortunatly through the course of gaming, or maybe because of Jose (either the real one, or the model one), he broke at the ankle. So instead of trying to rebuild his ankle, I made him into my driver.


Step 1 is to remove the paint from the two of them. So into the Simple Green to soak, then cleaned up with a scalpel and an old toothbrush.


The gunner is the easier of the two conversions. The basic Eureka model is great, but I don't like how he has the gun pointed at the sky. To change the angle of his arms, using a scalpel I carefully removed his arms, keeping them as intact as possible. At this point I would recommend to remove his base, you will need to remove it for him to fit nicely on the back of the landrover.


Then it is a simple matter of using greenstuff to reattach the arms, in the lower position. You may find it useful to remove some cloth from the arms, to make it a more natural pose. It is up to you, it's just to make you happy with it. I also tended to test fit them on the bed of the vehicle too, to make sure that I wasn't pointing the 50cal at the ground, or at the driver or something odd like that.

The 50cal is the one from the WMIK kit, with a few of the optics removed (based on my dice rolling, this Taliban doesn't aim). I used a spare metal pike (I use these a lot) to form the strut to attach the gun to the landy. I deliberatly cut it longer than I needed, that way I could check it off against the gunner, and to the height of the vehicle. Once I was happy with the location, it was a simple case to drill a hole in the landy. The hole was wider than I needed, so that I could use Greenstuff to make sure I had a nice join. I glued the gunner on at the same time.

So while the gunner is easy, the driver is a bit more involved. First thing to do is to cut the poor guy in half. I used a hacksaw to do it, while I held it in place with pliers.

Brutal but effective.


The Empress Taliban that I am using as a base had his left arm moulded on at his side, and the right arm as a seperate piece. This was perfect for me, so I left the left one on, and put the right arm into the bits box for the future.

The lower half and the right arm for my driver both come from the Academy MH-6 kit. One of the more odd things about that kit is that it contains 4 pilot figures, for a two pilot aircraft. It is even more odd when you think of all the number of 1:48 helicopters which come with no pilots (I'm looking at you Italieri). Crew rants aside, the spare pilot figures are great to make the seated drivers. Simply cut the pilot in half. You will need to lop the feet of the model, it just makes him sit better in the vehicle. The driver's right arm will also come from this kit.


While it may seem a simple case of a+b+c= driver, getting him to fit nicely into the technical, as well as looking right. Green stuff is your friend here again, I added a dishdash to cover up a few of my sins in the waist join, and did need to do some sculpting around his right shoulder.


Remember to keep test fitting him in the vehicle. I attached the steering wheel to the driver, and made a length of wire (from a spare pike) to connect it to the dash. It just helped to make the whole process easier, it was one less thing which I needed to make align nicely! I found that the driver sat much too high to use the steering wheel as moulded by Airfix, so creating my own attachment really helped me out in this process.

My first test fit of the two crew, without any green stuff.

One you are happy with the driver, I chose to add doors to the landy. Now the WMIK kit doesn't have doors, but the Snatch does, and it conveniently comes with two sets, open and closed. Getting them to fit is a bit trickier- you need to remove the top of the door (the bit that has the window) and also to remove a 2mm (ish) strip of the back of the door. It seems finicky, and to be fair it is a little bit, but not having the doors to me looks a bit odd. It is important to do that after the crewman, as it is a lot easier to test fit him without the door. Although, make sure you don't put his arm in the way of the door.

The fully assembled land-rover looks like this:


Note that the driver is not glued in, but the gunner is glued.

I chose to paint up the technical in a lovely pastel blue, which I then attacked with a whole lot of weathering.

This is the finished product:


The technical will hopefully be the first of a few of these models, I have a couple more vehicle kits which I plan to convert into Taliban vehicles.

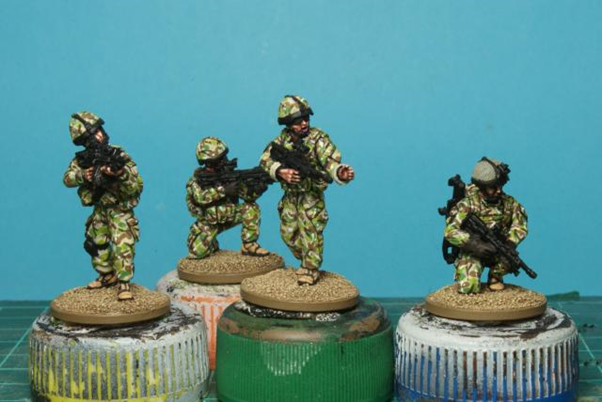
But for now, more Auzzies!

Pooch

Guns of August Convention Report

$
0
0
Hello everyone!  Our small local convention was held here in Williamsburg, Virginia back on the 22nd -24th of August.  The convention draws around 200 local mostly historical gamers each year so a fairly small gathering where most people know each other and things are always pretty relaxed.  The big difference this year was the fact that The Phalanx Consortium was there to promote and sell Skirmish Sangin.  Overall the informal and formal demos for the rules went well and we had the fun of adding the second board to the table so there were plenty of people stopping by to take pictures and ask questions about the rules.


Many in attendance had seen us at Historicon so they checked in to see what the latest updates were on the new supplements and figures.   We also had the opportunity to discuss participation in a couple of programs next year with a representative of the Virginia War Museum so we will be working with them on those programs and we will feature both game demos, as well as running a figure painting class for those wishing to participate.
While we held our formal demos in the evenings we did take time to take those interested over to the table to run through a few points of the rules before making their decision to purchase a set.  So having the demo boards on permanent display over the weekend help to afford these opportunities and we would like to thank the organizers for allowing us this flexibility.


As we announced on our Facebook page we were excited to add another retailer to our partner list over the weekend with The Dragon’s Hoard in Staunton, Virginia picking up stock for their store while they were down as another vendor for the weekend.  So if you live up that way or just passing through please stop by and see Harry and company in beautiful Downtown Staunton in the Historic Valley of Virginia.
During one of our evening demos the players were taken by how actual topography on a game table makes such a difference in how a game is played. While hard to completely appreciate in these photos the ISAF players used the low and obscured ground of the irrigation canal to bring troops around on the Taliban left forcing them to retire and melt into the populace versus getting overrun.


So all in all we had a great weekend and are looking forward to seeing those who can attend at Fall-In in Lancaster, Pennsylvania and Southern Front in Raleigh, North Carolina.  Both of these conventions will be held in November of this year.  Till then happy gaming!

Skirmish Sangin Armies of Afghanistan – M-ATV Build part 1

$
0
0
We have always been more than fortunate with the people we have involved with Skirmish Sangin, all those people that offer skills I just don't posses, which all comes together to create the high quality products we create for you, our discerning audience.


We are fortunate to have in our mists the Great Queeg aka Brent one of the world pre-eminent vehicle modellers (See the great example of his work above) and we asked him to put this together for you guys so over to the Queeg...

Musings from the warp...

While waiting for some of the ordered parts to arrive I filled in the time by assembling 2 Empress Miniatures Oshkosh M-ATVs to provide some patrolling and scout forces for our slowly building American forces.


The first thing that needs to be said is that these boys are big units. The only way to hide these things would be to find a building and drive into it for cover, and it’d have to be an American sized building at that, they stand over the Abrams and dwarf the British Jackals and US Bradley, which I thought were pretty big vehicles anyway. I must admit I’m unconvinced of their use outside of patrolling a tertiary warzone or policing duties but I guess time and combat success will tell the tale …. that and how they perform on the table of course!


 Now the models ….. as supplied they comprise 15 resin and 15 white metal parts. The resin is impressive, being very crisply moulded with very little clean up required to get the major parts flush and aligned. The basic assembly was straightforward  with only a couple of minor issues, while filing I did “break” through the resin surface and exposed a couple of sinkholes but a little Tamiya epoxy putty should fix them ok and one of my turrets was close to being a miscast. It looks like the moulds shifted during pouring with the top being off center to the base and one side pretty roughly cast, although after some clean up and paint I suspect only I’ll notice.  The white metal parts are ok and typical quality for mixed media wargaming kits.


And as usual for me lately I decided to add a bit of extra detail. These are big vehicles and as such I figured that any extra detail would help break up there size and provide a little more visual interest. After scouring as many web pics as I could find and also several 1/35th kit build and logs I added the following details;
  • lifting eyes on the lower hull sides and the upper rear of the cabin
  • support chains for the steps
  • front grill mesh
  • Rhino front mounted IED jammer
  • power supply boxes for the DUKE jamming system mounted on the rear cabin
  • rear access step ladder
  • mounting bracket for the spare wheel
  • hatch for the gunners O-GPK (Objective Gunner Protective Kit) turret
  • mounting brackets for the truck and turret wing mirrors
  • turret joystick slew controller
  • turret stowage rack
  • wiring for the aerials and low light TV drivers aid
  • Ibis Tek tow bar
  • coil springs and lower suspension arms (only on 1 and undecided if I’ll do the back or the other vehicle yet)


With most of the add ons in place I primed them with Tamiya rattlecan desert yellow enamel. It both acts as a primer and seal coat for the various materials used during detailing.  From here the tops coats and finishing work will all be brushed acrylics (mostly last gen GW).  After the base paint is only and most of the shading done I’ll add the final details that I’ve left off so as not to break them during all the handling while painting.

Still to add after base painting;
  • Aerials (4 per vehicle) and some wiring for them
  • Flexible cover for the Harris AN/PRC-152 SINCGARS radio (left rear)
  • tow shackles
  • emergency door pulls
  • tie straps for the Rhino and tow bar
  • side mesh for the rear stowage bins
  • various stowage bits to the rear bins


Brent

Aka Queeg ( check out more of Queeg's work at http://houseofqueeg.wordpress.com/)

After Action Report- Hot LZ!

$
0
0
Despatches II is coming together nicely, but before it can be fully completed Colin and I thought we should be sure that all of the scenarios inside it work well. Plus, we have had some comments that more AAR's will be better, so we thought we should combine the two, and show off some of the scenarios you will be able to find in Despatches II!

Note: In the pictures you will note a few clear plastic tokens and templates, these are a trial run which we have done, watch this space for when they will be released!

The mission we played was the Clear the LZ mission from Despatches II. The basic idea is that an Australian force is on patrol in a nameless village in the Urzgan province, when one of their number trips a booby trap, becoming wounded. The Auzzies call in a CASEVAC blackhawk, bad news is, they need to move to the LZ, and the Taliban are looking to ambush!

The scenario includes a Blackhawk helicopter on table, which is waiting for the auzzies to confirm that the LZ is secure so that it can land. I took charge of the Australian patrol, with Colin in control of the Taliban.

The initial Australian movements were to run onto the table, in smaller groups of two, wary of any Taliban. The ideal LZ was in a nearby field, so the Auzzies were moving at all haste to secure it.

Moving on up!

Advancing in the lush fields of Urzgan!

Unknown to the Auzzies, the Taliban had already secured key compounds in the area.


The first the Australians knew about it, was when a Novice Taliban with a PKM ran on to the table, and attempted to shoot at running digger. While a lot of noise occured, the recoil of the weapon made it next to impossible to hit (01% chance in fact!). But, morale markers onto the Auzzie.


The Auzzies returned fire, but were unable to hit, causing morale markers onto the gunner.

Even worse for the Australians, in a bypassed compound, a Taliban was hidden, lying in wait.


A Novice Taliban, what is there to fear? Well, after all the modifiers he had a 12% chance to hit. Colin rolled an 11, followed up by no less than 15 points of damage. My Body Armour save? A 1. Making a grand total of 5. Meaning the digger took 10 points of damage, and then proceeded to fail his consciousness roll. One soldier immediately out of action!

While this was happening, one of the more skilled Taliban had spotted another Australian advancing on the right flank. Again there was a very low, to hit number, but again it was hit and Colin rolled 12 wounds on him. My Body Armour save? A 1. My marksman with the HK417 took 7 wounds, and also failed his unconsciousness roll (Craig H will no doubt laugh, I keep doing that to his German marksman!).

With that shot, two soldiers immediately out of action!


It was also at this point that the CASEVAC bird arrived, and proceeded to unsuccessfully try and shoot things with it's door guns.


With the helicopter nearby, all of the Taliban were forced to take a morale test (helicopters are scary!). Unfortunatly for the Australians, all of the Taliban passed.

Making matters worse, Taliban reinforcements arrived, and promptly began unleashing a fusillade of small arms, PKM and RPG fire onto the Black Hawk. Due to the Black Hawk's speed, height and dashing good looks, none of the Taliban hit, but the helicopter was forced off table for an activation.

With the helicopter overhead, the Australians managed to clear out the novice in the compound which they missed and managed to somewhat continue their advance. A perfect grenade shot from the Underslung Grenade Launcher managed to hit no less than 4 Taliban in the KZ of the weapon, ending the threat from the far wood.

The last Taliban standing, and yes that is SIX morale markers on the poor chap. He, unsuprisingly failed his morale (he is a novice after all), and legged it.

The funny looking plastic thing in front of him is the forthcoming Grenade Template!

The Australians hunkered down in as much cover as possible, trying to survive the withering Taliban fire.


While the Australians were slowly able to reduce the numbers of Taliban, but not before an Auzzie was killed outright by a PKM gunner. At the end of the first combat turn, we called the game. The Australians had certainly not won the game, but nor had the Taliban. It was a brutal slugging match between the two forces, the Taliban had certainly taken major casualties but it would be the Australian Soldier killed, and the multiple wounded which would be on the front page of the Sydney Morning Herald tomorrow.

Next time I think we might try to get the bombmaker....

Pooch

Alex McC- Painting Kiwis

$
0
0
So Alex has come back, we had a few issues with getting him a set of our Kiwi figures at the start (we had sold out of them completely at the time!), so he was a bit behind the rest of us in starting his Armies of Afghanistan project. But, he has managed to get some progress, showing off where his Kiwis are at!

Well, this project took a little backseat for a while, as real life tends to get in the way, and I was a little held up getting all the elements in place due to Salute, and other things!

So far, I've begun work on the first fire-team of Kiwis After some pretty exhaustive research, I've settled on a coyote-brown vest and pouches, and the two-colour desert uniform. They're progressing nicely, though I think the base colour for the uniforms may be a little yellow. Never too late to refine!


The figures themselves are lovely, and needed very little cleanup to have ready for paint. I have 3 more fire-teams to work my way through, as well as some putty work to convert some combat engineers, and a Military Working Dog team. The dog is still too early to show, but there's a conversion from the Zombicide dog set in the works, and it seemed appropriate to pick the Blue Heeler model!

I've also begun working on the Humvee for the patrol, this is a lovely piece a resin from Imprint/Empress Miniatures. I did a little sprucing up, added a ratchet clamp to the spare strap from a 1/35th kit, and made the strap out of super fine masking tape for some texture. The antenna is just a piece of brass rod, mounted into the cast bracket. I also felt it seemed a little naked with no side mirrors, so I bent some brass rod, and cut plastic sheet to make the mirrors. It worked out okay if you ask me!


That's it for now, but I now have more time to get things done!

I reckon the base colour will work out- it will look a whole lot less yellow when you put the brown splodges of colour onto it! And as for the Military Working Dog- that sounds like an awesome idea, you will definitely have to share some pictures of that.

I am definitely looking forward to seeing how these turn out.

Empress Miniatures DEVGRU Miniatures

$
0
0
In preparation for Colin and my latest playtest game (I am just working on the AAR now, it will be up here on the weekend!), I needed to complete a set of the Empress Miniatures DEVGRU.

The miniatures I chose are the DEVGRU from the Empress Miniatures Website:


Having just watched Zero Dark Thirty a couple of weeks ago (I know, finally!), I had a pretty clear picture in my mind for how I wanted them to look. Like this in fact:

Image not owned by Radio Dishdash, images owned by Columbia Pictures and Annapurna Pictures

So with that as inspiration, this is my take on them. I wanted to get a washed out look for their uniforms, it seemed to me to be the only way to really paint the desert multicam!


All up, the DEVGRU from Empress are some absolutely cracking figures- some of the best that I have ever got from Empress actually. The proportions on them just "feel" right and the detail is superb. The Quad-eye NVG is a little annoying to fit, but with a little Green Stuff and superglue it was a simple enough job. Oh and patience. Patience is good when doing slightly fiddly things! For me, the NVG makes them look like futuristic space aliens, and I just love that aspect about it! Naturally had to go with green lenses on it as well. I am debating whether I make the lenses even more neon, but I am worried they might get a bit "cartoony". So for now, dark-ish green. I have added some tufts to the bases too, just to finish them off.

The AAR will be up at the weekend, of the SEALs in action hunting a bomb maker....

Pooch

After Action Report- SEALs hunting a bomb maker

$
0
0
Last weekend Colin and I played through another of the scenarios from the forthcoming Despatches II. This time, the scenario was all about a SEAL team ambushing a bomb maker as he lays an IED. The ambush is happening at night, so the SEALs have the advantage of their NVGs.

I brought the SEAL team you saw earlier in the week:


The scenario was that the SEALs started the game on table, lying in wait for the bomb maker, who had to come out and lay two IEDs.

SEALs in position:


The bomb maker advancing into position, then beginning to lay the bomb:

Now, reading the one sentence introduction, you might be thinking "That sounds odd Pooch, why would he be setting up 2 IEDs? How could the Taliban win the game? Well, those are both very good points. And that is where Colin and I got to very quickly! Basically the bomb maker walked on, then he got shot at, and then ran off the table.

Game over.

Was it fun? No.

So Colin and I took the scenario apart, and rewrote it. While we might consider ourselves to be rules writing super heroes, more often than not how we think things work in our heads, really isn't how things work on table. You can't be too precious about it, sometimes, things just don't make for a fun game!

Game Take 2

The bomb maker is just finishing up laying an IED, with his small protection team around him. Unbeknownst to them, a team of SEALs is lying in ambush positions, ready to capture the bomb maker.

The SEALs moved into position, getting eyes on the bomb maker.

Unfortunately, one of the Taliban had been eating all his carrots, and spotted one of the SEALs as he moved into position. The eagle-eyed Taliban shot.... and rolled a 12 to hit. When he needed a 14. Sigh. Damage? Lots. Armour Save? Not lots. Net result? One SEAL down, and the Talibs know that there are SEALs about!

Colin is becoming alarmingly good at shooting first!

With the first shots fired, the bomb maker saw his opportunity to escape. With his reserves arriving at one end of the road, he thought he would leg it the other way while the SEALs were distracted.

Pictured: A distracted SEAL, as he engages multiple hostiles, picking off the heavy weapons

The bomb makers escape was somewhat cut short as his attempt at running full pace was met with a crowd of civilians, tripping him up...
Yes, he really did trip up, right next to the civilians!

While this was going on, one of the Taliban had managed to bring a PKM to bear, engaging the SEALs, who's light body armour no help against the heavy caliber bullets.

The bomb maker had managed to disentangle himself from the civlians, and continued his mad dash away from the SEALs. He didn't count on the SEALs superior fitness, one of the team was able to not only run the bomb maker down, but also managed to subdue him.
Behind you!

While the bomb maker was being quickly escorted off the table, the remaining SEAL slipped quietly away.

And with that, the game was over!

The mission is much better now (you will be pleased to hear!), it is a quick and easy game, one which can easily be played due to the small numbers of troops on table. I know that you are going to love playing this one, it is pretty darn fun trying to chase down the bomb maker and arrest him!

Hoping to get another game in next weekend, there are still a couple of scenarios which we haven't shared yet. There is one in particular which I really think you are going to like.....

Pooch

Armies of Afghanistan- Dougie is back for Part 7!

$
0
0
After a while spent incommunicado, Dougie has sent through just a couple of little teaser pictures of the things he is working on. Mainly, that he is finishing up the second fire team he started a wee while back. You should also rejoice that his blog is back updating, if you don't know where to look, head here

First off gotta say sorry for the delay in this update, due entirely to my retirement and holidays with my good lady wife! Any hoo work on the second fireteam has progressed with the flesh and Multicam completed, I’ve just started on the boots so there’s not too much left to do.


I’ve also started a Eureka Talib, nice figures but I must get some DishDash examples!


Dougie

I hope you had a wonderful set of travels Dougie, but I must say that it is nice to have more pictures of that gorgeous multi-cam to grace our blog! Look forward to seeing the next set of Paras finished, as well as their opposition.

Taliban Reinforcements on their way!

$
0
0
The next wave of our range of Taliban have been spotted on their way in to Helmand.


They are currently off with the casters, we are hoping to have the whole swathe of Taliban ready to go very, very soon!

And now for some close ups of the figures:


Now, in case you are wondering how the first wave of Taliban look painted up, here is one of ours painted by one of our Insurgent Competition winners, Matt.


Matt's Taliban have a real mix of colours, a mix of blues, greys, yellows and browns. They should be a nice contrast to the black ninja uniform of his ISIS commander!

Now, no excuses, off you go to the Skirmish Sangin website and order your Taliban now, and get ready to order the next set very soon! So soon in fact, that Skirmish Sangin USA actually has the first reinforcements now!

Posts from the Sangin Community- British in MTP

$
0
0
We had been getting a few emails lately of things which people are working on. Keep them coming, it is always cool to see what people are working on for Skirmish Sangin!

Matt sent through some pictures of his Taliban a while back (we saw one at the weekend). Luckily for us, he has also sent through pictures of his British, along with a bit of how he did his take on MTP:

My aim was to give an impression of MTP, as fast as possible, and as easy to repeat as possible with my shakey hands and old eyeballs!

I did the painting on these in a day while wearing MTP trousers as a rough guide, then the next day was used to do the basing. So two days all up.

To start, I used a grey under coat, followed by a light green first coat liberally painted over all the cloth areas. I added some large dashes of light brown-always in horizontal lines where possible. Next up is thinner dark brown dashes near next to or through the light brown. Then with a khaki colour I put light dashed or splodges randomly here and there, hardly noticeable.

This was then followed by what I feel gives the multi-splodge/mtp impression- the palid flesh small dashes and dots often near where the other stripes are and the odd one randomly to kill any voids.

The rest of model (guns, boots, flesh and webbing) was worked on after this, once they were done the model was given a wash of GW's argrax earthshade mixed with games workshops medium so it flows nicer and avoids pooling.

I tried something a bit different on the guns too- they are painted a light tan colour then later dry brushed lightly with black to show where the spray has rubbed off, its becoming common now for troops out in the dirt to have coyote brown l85's


So there you have it, another way to paint MTP! The beret head comes from a Warlord Games WW2 kit (you can tell by his strong jaw!). I think Matt has done a great job on these, some great little detail touches there. Empress have just released a few new packs for their British, I for one will be picking them up to add to my forces!

Got an idea for a scenario? Or want to share some pictures of what you have been working on? Maybe an AAR of a game you have had. Send them through to chris@skirmishsangin.com and we will share them with the whole community.

Pooch


Posts from the Sangin Community- More British in MTP, and Terrain!

$
0
0
Following on from Matt's British last week, I got sent some pictures from Pat of his British, with yet another way of painting MTP!

Pat painted them using Humbrol Enamels (he calls himself "old school"!) I am sure if you would like the Humbrol list (for the other enamel-painting types out there), Pat will be able to share.

A big thanks to Pat for sending the pictures through, he had this to say...

As you can see I've got two moving Fireteams & one kneeling team, although I've got more figures to paint up, plus all of Empress Brit 06 so the exact teams will change. I saw the new Empress Brit 08 & 09 at the SELWG show, really cool especially the female medic and the vallon mine sweeper- but they weren't available, real shame but will order them later along with some of the new Taliban (good Christmas present, they will beat socks!).


So there you have it, another way of painting MTP! I like the nice mix of colours that Pat has used- it certainly looks the business!

Pat also sent through some WIP shots of his next batch of British, showing off some very neat greenstuff work!


Along with his British, Pat also sent through some images of a piece of terrain he is working on...


I for one, love how this terrain looks. It is made from 5mm foam board and are mounted on 3mm White Foamed-PVC (MDF works as well). Pat went with a pan-middle eastern white stucco paintjob, which has come out really nicely. For me, it is all about the fruit stands, the tiling, the white walls, I like it right down to the three colours of doors. Apparently it is a work in progress but I think it looks darn good as it is, and with the internal details (furniture) Pat is talking about it will look even better!

This is all just reminding me that I need to make more terrain.....

So now that we have three different ways of painting British MTP, so where is the love for the other ISAF nations? Surely you can't ALL be playing British... right? We must be due some other ISAF nations, or even some more Taliban? Send us through what you have finished through to chris@skirmishsangin.com, things like AAR's, ORBATs, Scenarios, Painting, Terrain and we will share them with the whole community.

Pooch

Happy Halloween!

$
0
0
Twas a dark and stormy night when the Royal Marines encountered something strange when out training around some old WW2 defenses...


We hope you enjoy your Halloween, thanks to Carvel for the picture, and watch out for Daleks!

Pooch
Viewing all 103 articles
Browse latest View live


Latest Images